CITRUS TUNA TARTARE
Hello lovelies!
Sorry I have not posted anything up the last several days. I have been so busy with getting the boutique up and also merging my old blog to my new blog in order for it to be linked from the shop. Yeah, I have a lot going on… But I promise I am now back and will do daily updates. I am not sure if you all got my last post regarding my move to: sweetmelange.wordpress.com. So for all of my readers, please follow me on the new one because that will be the only way you will get an email when I post.
Anyways, how was everyone Mother’s day? I had a wonderful day spending it with my family. Here are some pictures from last week.
Today I will be showing you how to make my all time favorite, tuna tartare. The husband and I both love sushi and we could eat it every day if it wasn’t so expensive. Now once in a while I do enjoy making my own sushi at home. Yes, I loved it so much that I learned how to roll up the sushi and make myself a roll. It’s actually not that hard but very time consuming. Now the Tuna Tartare is definitely easier to make then rolling up some sushi. First you want to make sure you buy fresh tuna. You don’t want to buy it frozen because it can actually make you sick if you consumed it raw. I usually purchase mine at either Central Market or Whole Foods. Make sure you get the Yellow Fin Ahi Tuna. So let’s get started!
Ingredients
¼ cup soy sauce
2 tablespoons fresh orange juice (about 1 orange)
1 tablespoon fresh lemon juice (about 1 lemon)
½ tablespoon water
½ tablespoon sweet rice wine
Dash of crushed red pepper
¼ teaspoon fresh ginger, peeled and finely grated
¼ teaspoon sesame seeds
4 green onions, thinly sliced
1 shallot, diced
½ pound sushi-grade yellow fin ahí tuna, chopped into ¼ to ½ inch cubes
1 can mandarins 1 avocado, chopped into ¼ to ½ inch cubes
Directions
Add soy sauce, orange juice, lemon juice, water, sweet rice wine, red pepper, ginger, sesame seeds, onions, and shallot in a bowl and whisk until combined. Marinate the tuna in the soy mixture for a couple of minutes. Put a cookie cutter on a serving plate and pack with avocado until it’s about ½ inch high. Slowly pull the cookie cutter up a little bit and pack with tuna pieces about ½ inch high. Slowly pull the cookie cutter up a little bit more and pack with mandarin pieces. Slowly remove cookie cutter. Repeat until all tuna is used. Serve with bagel chips, rice chips, or whatever you please.
TURKEY CHILI & CORNBREAD RECIPE
The weather here in Houston is getting cooler again and what is better than coming home to a warm bowl of chili with some homemade cornbread. Yum! I love it when the weather is cool or gloomy because I enjoy making some comfort food and to be tuck under the covers. For this recipe I like to make a healthier alternative to the regular chili. Not only does this recipe have low calories but it taste delightful!
Turkey Chili Recipe
Ingredients:
1 pound lean ground turkey
1 small red onion, chopped
2 garlic cloves, minced
1 can diced tomatoes, undrained
1 can black beans, rinsed and drained
1 can reduced-sodium chicken broth
1 bag frozen sweet corn, thawed
1 can (6 ounces) tomato paste
1 tsp. chili powder
½ tsp. pepper
¼ tsp. ground cumin
¼ tsp. garlic powder
¼ tsp. salt
Optional toppings: reduced-fat sour cream, fresh minced cilantro, and sliced avocados
Directions:
In a large skillet, cook the turkey and onion over medium heat until meat is no longer pink. Add garlic; cook for 1 minute longer. Drain. Stir in the tomatoes, black beans, broth, corn, tomato paste, chili powder, pepper, cumin, garlic powder, and salt. Cover and cook on low for 2-4 hours or until heat through. Serve with optional toppings if desired.
Cornbread Recipe
Ingredients:
1 cup cornmeal
½ tsp. baking soda
1 cup all-purpose flour
½ tsp. salt
½ cup butter
2 eggs
2/3 cup sugar
1 cup buttermilk
Instructions:
Preheat oven to 375 degrees. Grease an 8 inch square pan. Melt butter in a large skillet. Remove from heat and stir in sugar. Quickly add eggs and beat until well blended and few lumps remain. Pour batter into the prepared pan. Bake in the oven for 30 to 40 minutes, or until a toothpick inserted in the center comes out clean.
CHEWY PEANUT BUTTER CHOCOLATE CHIP COOKIES
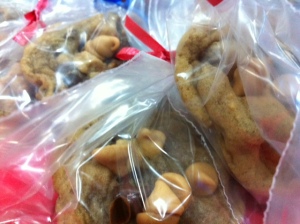
If you love Reese’s Peanut Buttercups or Reese’s Pieces as much as my husband does, you will love these Peanut Butter Chocolate Chip Cookies! They are chewy with a slightly crisp edge, making these the best cookies ever! I am very picky when it comes to the texture of cookies. I love my cookies chewy and soft. So this is my go-to recipe when I want some yummy chocolate chip cookies. Get your milk ready, its cookie time!
Ingredients:
2 cups plus 2 tbsp. all-purpose flour
1/2 tsp. baking soda
1tsp. salt
1 cup (2 sticks) unsalted butter, room temperature
1 cup packed light-brown sugar
½ cup granulated sugar
2 large eggs
2 tsp. vanilla extract
1 cup semi-sweet chocolate chips
1 cup peanut butter chips
Directions:
Preheat oven 350 degrees. Line two cookie sheets with parchment paper. Whisk dry ingredients together in a medium bowl; set aside. With a mixer, mix butter and sugar until thoroughly combined. Beat in egg, yolk, and vanilla until combined. Add dry ingredients and beat at low-speed just until combined. Stir in chocolate and peanut butter chips. Use a melon scooper to scoop out dough. Drop dough about 2 inches apart on baking sheets. Bake until cookies are golden around the edges, but still soft in the center, for about 8-10 minutes. Optional: add extra chocolate chips on top. Remove from oven, and let cool on baking sheet. Transfer to a wire rack, and let cool completely. Store the cookies in an airtight container at room temperature up to 1 week. Enjoy!
BRUNCH: CRAB EGGS BENEDICT RECIPE
Brunch makes weekend mornings wonderful! I love brunch on a beautiful Sunday morning with my husband, spending that quality time with him and enjoying some yummy breakfast just tops it off. One of my favorite breakfast recipes is crab eggs benedict. Possibly it is because of the buttery taste of English muffin, the sweetness of fresh crab meat, and the creaminess of Hollandaise sauce that makes the dish just scrumptious. Pair it with a glass of mimosa and you got yourself a delicious breakfast.
Ingredients:
6 large egg yolks
¼ cup lemon juice
2 tablespoon Dijon mustard
1 ½ cups melted unsalted butter
½ teaspoon salt
1/8 teaspoon black pepper
1/8 teaspoon cayenne
4 English muffins
2-6 ounce cans of crab meat
4 large eggs
Directions:
Make hollandaise sauce: In the bottom of a double boiler bring 1 inch of water to a simmer over high heat and adjust heat to maintain simmer. Put egg yolks, lemon juice, and mustard in top of a double boiler and set over simmering water. Wish yolk mixture to blend.
Whisking constantly, add butter. Then add salt, pepper, and cayenne and continue whisking until thick about 3 minutes. Adjust seasonings to taste. Remove from stove and set aside.
Optional: Sautéed spinach. In a large skillet, heat the oil over high heat. Add spinach and cook. Add some garlic powder, salt and pepper to taste.
Preheat oven to 450 degrees. Split English muffins and arrange on a baking sheet in a single layer. Bake until toasted, about 5 minutes.
Put 2 muffin halves on each plate and top sautéed spinach and crab, dividing evenly.
Poach eggs: Bring 1 inch water to boil in a 12-inch wide pan. Lower heat so that small bubbles form on the bottom of the pan. Crack eggs into water 1 at a time, holding shells close to the water’s surface and letting eggs slide out gently. Crack eggs in 2 batches to keep them from crowding, 3-4 minutes for soft-cooked. Lift eggs out with a slotted spoon, pat dry with a paper town, and place 1 egg on each crab-topped muffin half.
Top each egg wit 2-3 tablespoons of reserved hollandaise sauce and serve hot.
BASIC MACARON RECIPE
I have always been a big fan of French Macarons. Maybe it’s because I cannot get over how darn cute they are! Perhaps it is the beautiful colors and the crunchy-chewy texture. Before I tempted to make these, I actually did some research and read so many horror stories of how delicate these babies are. After many attempts, I finally master them. I figure out that all it needs is some patience and loving touch.
Basic Macarons with Almond Buttercream
Ingredients:
Macaron Shells
100 grams (1 1/8 cup) ground almonds
100-110 grams (3 eggs) egg whites, aged 1 day at room temperature
200 grams (1 1/2 cup) powdered sugar
45 grams (4 tablespoons) granulated sugar
Buttercream filling
5 tbsp. butter, at room temperature
80 grams powdered sugar (1/2 cup)
1 tbsp. almond extract
Directions:
Grind the almonds in a food processor. Sift to get rid of any large pieces. Mix the powdered sugar together with the ground almonds in a food processor. In a large bowl, whip the egg whites with a mixer. As the egg whites start foaming, add the sugar one tablespoon at a time and continue whipping until the mixture is glossy and stiff. You should be able to hold the bowl upside down without the meringue sliding out.
Fold the dry mixture into the meringue using a spatula. Do not over mix! Put your piping bag in a tall glass and fill your piping bag and pipe the macarons onto baking sheets. The shells will flatten, so do not make them too big. About 1 inch is enough. Let them set for 30 minutes to form a dry skin.
Heat the oven to 150 degrees. Bake for 10-12 minutes in the middle of the oven. Keep a close eye on them the last couple of minutes as they brown easily. Let the shells cool completely before removing them from the baking sheets.
Fillings:
Add the powdered sugar to the soft, room temperature butter. Beat the two together until fluffy. Add a tablespoon of almond extract and beat a little more until incorporated. I like to be precise, so I pipe the filling and sandwich the macaron shells together. You are now done!
You can use any type of filling you like, my favorites are buttercreams, but you can use ganaches or jams. Macarons can be eaten right away, but if you cannot devour them all in one section, you can put them carefully in a box with an air tight lid and refrigerate them. Enjoy!
CINNAMON SWIRL PROTEIN BREAD
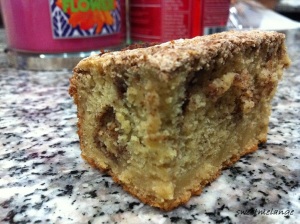
Since we are on a healthy binge… How about a sweet and healthy recipe? I will be showing you how to make this scrumptious cinnamon swirl protein bread. The smell of freshly baked cinnamon bread with a morning black coffee will help start the day. For the indulgence of sweetness that is overflowing with protein. And the best part about it, is that it has fewer calories than your average cupcake. What a win, win situation!
Ingredients:
1/3 cup Truvia
2 tsp. cinnamon
1 1/2 cups oat flour
2 scoops vanilla whey protein
1 tbsp. baking powder
1/2 tsp. salt
1/2 cup Truvia
2 egg whites
1 cup unsweetened almond milk (Almond Breeze)
1 4 oz. jar of baby food applesauce
1/4 cup low sugar vanilla yogurt
Directions:
Preheat oven to 350 degrees. Spray 8×8 dish with non-stick spray. In a small bowl combine 1/3 cup Truvia and 2 tsp. cinnamon. Then in a large bowl combine 1 1/2 cups oat flour, 2 scoops vanilla whey protein, 1 tbsp. baking powder, 1/2 tsp. salt, and 1/2 cup Truvia. Whisk all the ingredients and set aside. Now in a medium bowl combine 2 egg whites, 1 cup unsweetened almond milk, 1 4oz. jar of baby food applesauce, and 1/4 cup low sugar vanilla yogurt. Whisk these ingredients together and add it to the large bowl. Pour it in the baking dish and sprinkle with half of the cinnamon/sugar mixture. Draw a knife through the batter to marble. Pour the rest of the cinnamon/sugar mixture on top. Bake for 24-28 min. Let cool completely and cut in squares to serve.
VEGETARIAN STUFFED PEPPERS
Preheat oven to 350 degrees. Cut out stem ends of bell peppers. Discard seeds and membranes. Heat oil in a skillet, then add onions and garlic. Saute for a few minutes, then add rice and beans. Add all spices and cook until heated through. Remove from heat and add a can of tomatoes. Place in a casserole dish and fill each with rice mixture. Bake for 20 minutes. Remove from oven and add cheese on top and cook for another 5 minutes, or until cheese is melted.
FRENCH TOAST BACON CUPCAKES WITH MAPLE BUTTERCREAM FROSTING
Lets talk about a mixture of sweet and savory. I do not know about you guys but I love bacon! Now have you ever tried a bacon cupcake? It is like eating a french toast and a bacon all in one and can be eaten at any time of the day. I believe I saw a similar recipe to this from the Food Network. The sweet and salty flavors all complements itself.
Ingredients:
1 1/2 cups all purpose flour
1 1/2 tsp baking powder
1/2 tsp cinnamon
1/8 tsp ground nutmeg
1/4 tsp salt
3/4 cup sugar
1/4 cup brown sugar
1/2 cup unsalted butter, melted then cooled
2 eggs, room temperature
1 tsp maple extract
1/2 tsp vanilla extract
1/2 cup milk
10-12 slices bacon
Directions:
Cook bacon in a fry pan until fully cooked and crispy. Turn the strips out onto paper towels when done and set aside to cool. Cut a couple of strips of bacon into 1 inch pieces on a diagonal, to be used as garnish. Finely chop the remaining bacon. Then, preheat the oven to 350 degrees.
Sift flour, baking powder, cinnamon, nutmeg and salt into a small bowl. In a large bowl beat together butter, sugar and eggs on medium-high speed until light and fluffy. Feel free to sub bacon fat for a small portion of the butter. Add the maple and vanilla extracts. With the mixer running at medium speed, alternately add in flour mixture (3 additions) and milk (2 additions), starting with the flour mixture; beat until smooth. Fold in chopped bacon until evenly distributed.Scoop batter into muffin tin lined with paper cupcake liners. Bake for 15-20 minutes, until passing the toothpick test. Place on a rack to cool.
Maple Buttercream Frosting
2 cups confectioner’s sugar
2 sticks butter
4 oz. cream cheese
2 tbsp pure maple syrup
1/2 tsp vanilla extract
1/2 t maple extract
pinch salt
In a bowl with an electric mixer or stand mixer fitted with the paddle attachment, beat butter and cream cheese until light and fluffy. Add maple syrup, vanilla, maple extract, and salt, and beat until fully incorporated. Add confectioner’s sugar, one half cup at a time until reaching desired consistency. Beat until smooth and fluffy, about 5 minutes. Frost or pipe onto cooled cupcakes. Garnish with inch-long bacon pieces.
CHEWY CHOCOLATE MERINGUES
I picked up this book several months ago and stumble upon many delicious recipes. The one recipe that stuck to me and definitely was a must to try: Salty Tart by Michelle Gayer. Her recipe for Chewy Chocolate Meringues is delightful. And what makes it even better is that it only needs four ingredients. How easy is that?
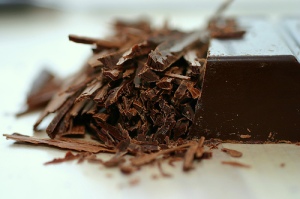
Chopped bittersweet chocolate and 5 tablespoons of unsweetened cocoa powder.
1 cup egg whites, 7 eggs and 2 cups of sugar. In a heat proof bowl whisk the two until sugar is completely dissolved. Then using an electric mixer, beat the egg mixture until becomes stiff.
Gently fold together the chopped chocolate over the meringue until incorporated. Then scoop them out using an ice cream scoop. Place it in the oven for about 9 minutes. And…
Ta Da! It is that easy. And once you eat them, you definitely cannot stop. They are super addicting!
It is crunchy on the outside and filled with gooey yumminess in the inside. Enjoy!
Ingredients:
1 cup egg whites (about 7)
2 cups sugar
5 Tbs. natural cocoa powder
4 oz. bittersweet chocolate, finely chopped
4 oz. cocoa nibs
Directions:
Space 2 racks evenly in the middle of an oven and preheat to 350°F. Line 2 baking sheets with parchment paper.
In a clean, dry, heatproof bowl, whisk together the egg whites and sugar. Set over but not touching simmering water in a saucepan. Whisk constantly until the sugar is completely dissolved. Remove from the heat.
Using an electric mixer fitted with the whisk attachment, beat the egg mixture on high speed until stiff and glossy. Sift the cocoa powder over the meringue. Sprinkle with the chocolate and cocoa nibs, then fold together gently with a rubber spatula until combined.
Drop the meringue by heaping tablespoons, spaced slightly apart, onto the prepared baking sheets. Bake for 9 minutes. Rotate the pans and bake until the cookies are fluffy, full of cracks and spring back when touched, about 9 minutes more. Carefully pick up the parchment sheets and transfer the cookies, still on the parchment, to wire racks to cool. Makes about 2 dozen meringues.
Adapted from Williams-Sonoma Home Baked Comfort, by Kim Laidlaw (Weldon Owen, 2011).
ARTICHOKE ICED TEA
Growing up my mother has always made us Artichoke Tea drink. In Vietnamese we call it, Nước mát, which means refreshing water. It was my all-time favorite drink, especially during the summer. Of course during those years I had no clue I was drinking Artichoke, not until my high school years. Then after researching the beneficial of drinking Artichoke I realized that the drink was even tastier. Recently I went to Trader Joe’s and found some. So I believe the season for Artichoke is sometime in spring through summer.
Why is Artichoke good for the human body? Now let me share some facts and science to this theory. Artichoke is rich in carbohydrates, antioxidants, vitamins and minerals. Artichoke can be made into an herbal tea, which affords some of the quality of the whole vegetable. The drink acts as a diuretic and improves liver function and it also helps stimulate the immune system, preventing the risk of inflammation and intensify the resistance of the body against illnesses. Drinking artichoke tea regularly is also a good way to beautify the skin.
So though it might not sound appetizing or look appealing, but trust me… It is something you all should definitely try to find out. Enjoy!
Artichoke Iced Tea (Nước Mát)
Ingredients:
2-3 whole artichokes
1 gallon of water
sugar (honey, rock sugar, palm sugar)
Directions:
In large pot bring water to boil. Add artichoke and reduce heat to a gentle simmer and cover for about 1.5-2 hours or until the artichokes are completely soft. Remove the artichokes. While water is still hot, add desired amount of sugar to taste and stir until dissolved. Allow to cool before draining to serving container. Served chilled.
MINT CHOCOLATE CHIP ICE CREAM CUPCAKES
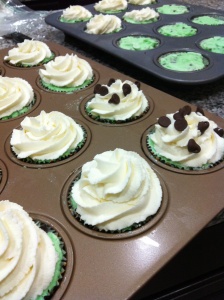
Several months ago we had a pot luck at the house and I made the best cupcakes ever. Mint Chocolate Chip Ice Cream Cupcakes! They were the easiest thing to make and just perfect for any occasion, especially for the summer when you have a BBQ outside with the family. It is perfect to hand out to the guests. I made the cake with chocolate batter and then a scoop of mint chocolate chip ice cream. Purely delightful! Then top it off with some chocolate chips and you got yourself a delicious mint chocolate chip ice cream cupcakes!
I made my batter using Chocolate Cake. You can either buy the store box or make your own chocolate cake from scratch. Either or will do! Then I bought a tub of Mint Chocolate Chip Ice Cream or any variety ice cream you like. After that, I made my own Whipped Cream Frosting. And there you go… Now you got yourself some delicious cupcakes! Enjoy!
Ingredients:
Cake part: chocolate cake mix (store bought)
Ice Cream: Blue Bell or Ben & Jerry’s Mint Chocolate Chip Ice Cream
Whipped Cream Frosting: 1 ½ cups heavy cream, 1 tsp. vanilla extract, 1/2 cup powdered sugar.
Instructions:
Preheat oven to 350 degrees F. Put cupcake liners into the muffin tins and measure out about 1 Tbsp. of batter into each liner. Bake for about 15 minutes. Do not take the cupcakes out of the pan just yet.
Once cooled, scoop some of your softened ice cream on top of the cake until it reached the top of the liners. Place it in the freezer and freeze until the ice cream is hardened.
While the cupcakes are in the freezer, make the whipped cream frosting. Pour the chilled whipping cream into the bowl of a stand mixer. Beat the cream until soft peaks form. Lightly pour the powdered sugar and vanilla extract and beat until soft peaks form. Do not over beat.
Right before serving top the whipped cream frosting and add the chocolate chips!
We devour it before I could take a picture of the actual cupcakes. So the only pictures I have is when I took it out of the freezer and when I put whipped cream frosting on top. Sorry! But I do plan to make some soon, so I will definitely post more pictures up soon or maybe do another post on a different ice cream flavor. Thank you for reading!
KOREAN-AMERICAN FUSION KIMCHI FRIES
Over the last several years, the food truck scene has been really growing, especially in Texas. I want to share with you the first food truck dish I fell in love with: Korean-American fusion Kimchi fries. It is definitely a comfort food with an international twist. The crispy fries topped with melted cheese, the savory taste of Bulgolgi meat, and the tanginess of the fermented Kimchi completes the dish. Please do not worry when I say fermented Kimchi, it is actually very appetizing. You do not have to make it, you can actually purchase the Kimchi at any local Korean store. So here is the recipe to my own twist to the Korean-American fusion Kimchi Fries.
Ingredients:
1 Bag Frozen Fries
1 Pound of Bulgogi, recipe follows
Caramelized Kimchi
1 Jar of Cheez Whiz
Mixed Lettuce, recipe follows
Spicy Mayo, recipe follows
Bulgogi (Korean-Style BBQ Beef):
1 pound thinly sliced rib eye steak
1 Jar of Bulgogi Marinated Sauce
1 tsp. Sugar
1 tsp. Garlic Powder
1 tbsp. Sesame Oil
Salad:
4 cups chopped romaine lettuce
½ cup thinly sliced green onions
½ cup thinly sliced cilantro
Dressing for the Salad:
1 tbsp. soy sauce
1 ½ tsp. lime juice
1 ½ tsp. sesame oil
¼ teaspoon sugar
Spicy Mayo:
½ cup mayonnaise
3 tbsp. Sriracha
1 tbsp. chili oil
Directions:
- Baked the frozen fries as directed.
- Make the Bulgogi: in a resealable plastic bag, pour in the Bulgogi Sauce. For me, I prefer to add a little extra seasoning but if the sauce tastes good for you, you can omit the extra seasonings. Add the rib eye and toss to coat. Seal the bag and refrigerate overnight.
- Drain the meat. In a large skillet, drizzle about a tablespoon of vegetable oil until hot. Add the meat and cook over high heat, turning once, until lightly browned, about 4 minutes. Transfer the meat to a plate and keep warm.
- Prepare the toppings. In a medium bowl, combine dressing and salad.
- Heat the Cheez Whiz.
- Top the French fries with a layer of caramelized Kimchi and Bulgogi meat. Pour some cheese over it. Sprinkle the salad over to taste and then top it off with spicy mayo and extra Sriracha for more spiciness.
Ta Da! Now you got a food truck dish in your very own kitchen. Enjoy!
BAKED BACON & EGG MUFFINS
We all know that breakfast is the most important meal of the day. But I guess we always wonder why? I would like to share some facts and science to this theory. Food is a fuel and energy for our bodies. When our bodies have the proper nutrition, it will function to its fullest. It also increases the metabolic rate and has shown to help maintain weight loss.
At this point in my life, being as busy as I am… I am always trying to find a quick solution to everything, especially when it comes to cooking. When you have kids, you want to make sure you put healthy food on the table. Here is a quick, easy, and creative way to make a delicious, yet savory ALL-IN-ONE breakfast.
Ingredients
3 tablespoons unsalted butter, melted
8 slices white or whole-wheat sandwich bread
6 slices bacon
6 large eggs
Coarse salt and ground pepper
Directions
1. Preheat oven to 375 degrees. Lightly butter 6 standard muffin cups. With a rolling pin, flatten bread slices slightly and, with a 4 1/4-inch cookie cutter, cut into 8 rounds. Cut each round in half, then press 2 halves into each muffin cup, overlapping slightly and making sure bread comes up to edge of cup. Use extra bread to patch any gaps. Brush bread with remaining butter.
2. In a large skillet, cook bacon over medium, until almost crisp, 4 minutes, flipping once. (It will continue to cook in the oven.) Lay 1 bacon slice in each bread cup and crack an egg over each. Season with salt and pepper. Bake until egg whites are just set, 20 to 25 minutes. Run a small knife around cups to loosen toasts.
STRAWBERRY CUPCAKES WITH STRAWBERRY SWISS MERINGUE BUTTERCREAM
Today I thought I would share with you these yummy strawberry cupcakes. I am longing for spring, which is actually right around the corner. And what is better for spring than these delicious strawberry cupcakes?
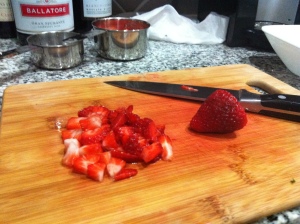
All through my life I have always loved to bake and especially after becoming a wife and mother. I saw these strawberry cupcakes with strawberry Swiss meringue buttercream from the book of Martha Stewart’s Cupcakes and this was my first attempt making it. I pureed fresh strawberries which makes it the perfect complement to the strawberry cake. Plus the Swiss meringue buttercream is fluffy and absolutely melts in your mouth.
So what makes this cupcake so marvelous? The moist cake that is full with tons of chopped fresh strawberries and the strawberry Swiss meringue buttercream that is absolutely to die for. My husband was the first taste-tester and the reaction on his face was priceless. Although the process is a little time consuming but it is definitely worth it when your love ones enjoy it. Enjoy!
Strawberry Cupcake Recipe
Ingredients
1 1/2 cups all-purpose flour
1 1/2 cups cake flour
1 tablespoon baking powder
1 teaspoon salt
1 cup (2 sticks) unsalted butter, room temperature, plus more for pans
1 3/4 cups sugar, plus more for sprinkling fruit
4 large eggs
2 teaspoons pure vanilla extract
1 1/4 cups milk
10 ounces diced strawberries
Directions
1. Preheat oven to 350 degrees. Line 2 1/2 standard 12-cup cupcake pans with paper liners; set aside.
2. Into a medium bowl, sift together flours, baking powder, and salt; set aside.
3. In the bowl of an electric mixer fitted with the paddle attachment, beat the butter and sugar until light and fluffy, 3 to 4 minutes, scraping down the sides of the bowl as needed. Beat in eggs, one at a time, and then beat in vanilla. With the mixer on low speed, add the flour mixture in three parts, alternating with the milk and beginning and ending with the flour; beat until combined after each addition. Fold in strawberries.
4. Divide the batter evenly among the prepared cups so that each is about two-thirds full, about 2 ounces each. Bake, rotating the pans halfway through, until the cupcakes are golden brown and a cake tester inserted in the centers comes out clean, about 20 minutes. Transfer pans to a wire rack to cool for 5 minutes. Remove cupcakes from pan and cool completely on wire racks.
5. Pipe Strawberry Swiss Meringue Buttercream on top of each cupcake. If you like, garnish with strawberries.
Strawberry Swiss Meringue Buttercream Recipe
Ingredients
4 large egg whites
1 1/4 cups sugar
1 1/2 cups (3 sticks) unsalted butter, room temperature, cut into tablespoons
1 teaspoon pure vanilla extract
1 1/2 cups (12 ounces) strawberry, pureed in a food processor
Directions
1. In the heatproof bowl of an electric mixer set over a saucepan of simmering water, combine egg whites and sugar. Cook, whisking constantly, until sugar has dissolved and mixture is warm to the touch.
2. Attach the bowl to the mixer fitted with the whisk attachment. Beat the egg-white mixture on high speed until it holds stiff peaks. Continue beating until the mixture is fluffy and cooled, about 6 minutes.
3. Switch to the paddle attachment. With mixer on medium-low speed, add butter several tablespoons at a time, beating well after each addition. Beat in vanilla. Beat on lowest speed to eliminate any air bubbles, about 2 minutes. Stir in pureed strawberries with a rubber spatula until frosting is smooth.
ROMANTIC CHOCOLATE COVERED STRAWBERRIES
It’s that time of the year again. The month where grocery stores are filled with heart-shaped balloons, flowers, candies, teddy bears and ‘I love you’ cards. But what is Valentine’s without chocolate and strawberries? In my opinion, chocolate is one of the more seductive desserts, so it definitely goes well with the event. This dessert is easy and yet, inexpensive to make. Decorate it with some love, put it in a box, tie it with a bow and you got yourself a comparable ‘Edible Arrangements’.
I learned how to make these yummy desserts several years ago. As newlyweds, I did not know what to get him, since he has everything. So I thought what a better gift than to make something. Plus it was a bonus since he loves chocolate. Now once in a while when he craves for them, I make it. So it doesn’t have to be for this occasion but useful for any day. Add a glass of champagne makes it a perfect touch.
Ingredients:
1 container of strawberries
2 4-oz package of bittersweet chocolate, chopped
2 tbsp. shortening
Line a baking sheet with parchment paper. Rinse the strawberries and pat dry. Then set aside. Chop up the chocolate and place in a bowl. Add 1 tbsp. of shortening. Place over a double boiler and stir until chocolate is melted. Take the bowl off the double boiler and dip the strawberries into the chocolate. Here’s the fun part: decorate it with heart-shaped sprinkles, nuts or drizzle white chocolate over. The possibilities are endless. Enjoy!
Here is the final result of my chocolate covered strawberries. Have fun with it and create it any way you like.













Amazing! I ca never get my frosting to look that pretty!
Thank you! It took a lot of practices.