DIY TWO-TIERED JEWELRY/MAKEUP ORGANIZER VANITY STAND

This past weekend, I recently took over my husband’s office and made it into my very own personal craft room. I was bringing over many of my things and wanted to display it on something cute. So I decided to make a two-tiered “cupcake” organizer. If you enjoy this tutorial, please be sure to subscribe to my blog for more DIY crafty goodness.

It is super simple to put together and also super cheap. It literally cost me under $5 to put this all together. You can put your jewelry on it, makeup, nail polishes, or anything extra.

Supplies:

Different sized glass plates, so you can get that nice graduated look from top to bottom. The glass plates you see in my project came from the dollar store.

Glass candlestick holder – I could not find any at the dollar store, so I got mine at Marshall’s.

Glass Paint – I used Martha Stewart in Pearl, I got mine at Michaels.

Paint Brush or Sponge

Industrial Glue – I got mine at Michaels

Clear Gloss Protective Enamel – I got mine at Lowe’s

Instructions:

Glue a candlestick holder to the center of your largest plate using the industrial glue. Firmly press the lower tier to the glue for 30 seconds. Then, apply glue to the top of the candlestick and center the top tier on the candlestick. Let it sit for an hour to dry. 

Now onto painting… Squeeze the bottle of glass paint to the plate. Paint until fully covered. Let it dry for about 2 hours and apply another coat. Let it dry for another 2 hour and then spray the clear gloss protective on to the plate. After it is fully dry, if you like, you can deck your stand out with flowers, pearls, etc. I left mine as is.

893586dbbe0956b93cbaa4cfe61846d5

There you have it. You now have a jewelry/makeup/anything-you-like organizer vanity stand. Let me know if there is any DIY project you would like for me to do in the comment section below.

STYLISH KID’S ROOM

I am so excited to share these photos of our kids’ room with all of you! We recently did a makeover to our kids’ rooms. Chloe and Cohen are growing up way too fast and it was time for us to create a big kid’s room for them. When designing the rooms, I tried to avoid anything that resembles themed décor – like Disney characters, princesses, Star Wars, etc. I wanted to create an age appropriate room that is not overly themed and can easily be transformed into a more grown-up space as the kids get older. Check out our rooms below…

Let’s start with Cohen’s room. It was inspired by Guilana Rancic nautical-themed nursery room for baby Duke. I saw it on her show, “Guiliana & Bill”. It has such a modern look and yet still feels like a kids room. Cohen’s room is kind of small so we worked with what we got. I bought the high-gloss gray bookshelf and baskets from Ikea, the octopus picture came from Allposters.com, and his bed was my daughter’s old bed from Pottery Barn Kids which my husband painted it gray to give it a more masculine look. To complete Cohen’s room, I will be adding a zig-zag rug that I purchased from Dwell Studios.

photo 1

photo 3

photo 6

For Chloe’s room, we painted it white and purple as mentioned before. We spray painted a tree branch that my husband took from his parent house and hung it above her bed. I also added some birds that I cut out to give it a chic look. I bought the decors from Michaels and I handmade the lampshade (for the tutorial click here). My daughter loves her books, so we bought these shelves from Ikea and created her a bookcase.

photo 4

photo 5

ruffled lampshade tutorial 5

I hope that gives you a few ideas on what you can do to decorate a boy and girl room. Which rooms do you like best? Let me know in the comment section below. Have a great weekend!
RUFFLED LAMPSHADE TUTORIAL

Finally, a break to sit down and blog today! Sorry, I have been super busy with the family and our Easter get together. I know I promise everyone that I will post some pictures of my daughter’s room soon. I did some renovation to her room but we are not fully done yet. I am still waiting for her bed to come in. So as soon as everything is done I will do a room tour. But for today, I want to post the ruffled lampshade I did for my daughter’s room. I saw this tutorial on dearlillieblog. Her decor is amazing!
Here is what you need:
ruler
scissors
hot glue gun
sewing machine or needle and thread
a lampshade
fabric
Instructions:
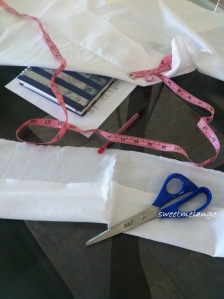
1) Measure your shade. Mine was nine inches high.
ruffled lampshade tutorial
2). Now divide that by three if you want to do a shade with three ruffles. Once you have divided it by three, which for mine was 3″ for the width of each strip of fabric you will cut. Now start cutting three long strips. I recommend starting with three but you may need to cut more.
ruffled lampshade tutorial 2
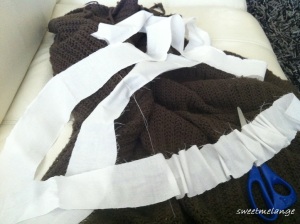
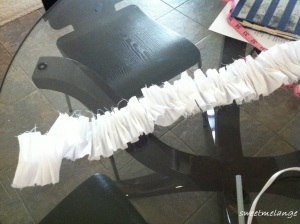
3) Next, start sewing. I stitched mine by hand. I just simply hand stitch a straight like down the middle and then pull the thread once I got to the end and ‘ruffle’ the fabric.
ruffled lampshade tutorial 3
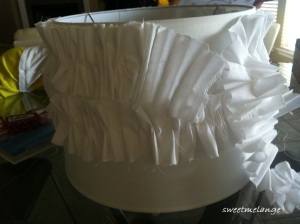
4). Now it’s time to glue. Start with the middle ruffle because then it will be easier to make sure it looked uniform on the top and bottom. Put several drops of glue around the shade and then pressed the fabric down onto it.
ruffled lampshade tutorial 4
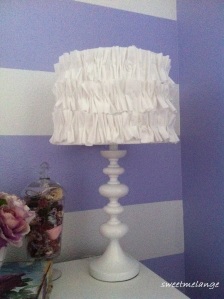
5) Now add the top ruffle and bottom ruffle. Ta da!!! It looks great in my daughter’s room.
ruffled lampshade tutorial 5
On another note, we had such a great Easter with the family. My brother boiled crawfish at the house and we had an Easter egg hunt for the kids. Here are a few photos I would like to share..
easter 3
easter
easter 2
easter 4

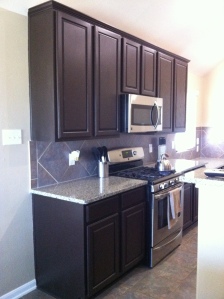
EASY DIY RENOVATING KITCHEN CABINETS

Have you ever thought about renovating your kitchen cabinets? I did! I talked to a couple contractors and was quoted anywhere from $3,000-$5,000 to get my cabinets refinished. We just moved in and with all the furniture expenses, my husband and I decided to take the task on ourselves.

We moved into the house two years ago and the owner before us had oak cabinets. I was definitely not a fan of it! I always liked a contemporary style kitchen, with dark color cabinets. So we decided to visit Home Depot to look for the color we wanted to use and stumbled upon an all-in-one cabinet transformation kit. The husband and I knew that purchasing this kit will save us a lot of money and yet still be a fun DIY project.

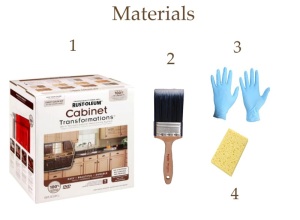
Taking on this project was not bad at all. There was some complaining here and there but in the end it was definitely a rewarding outcome. The husband and I split the job up to make the task a little faster. Here are the materials we used:

materials

1. Rust-Oleum Cabinet Transformations 9-Piece Kit Espresso

2. Paint Brush (Here’s a tip: get a really good 1” paint brush; it is worth it to buy the best one. You do not want any fall outs from the brush)

3. Gloves

4. Sponge

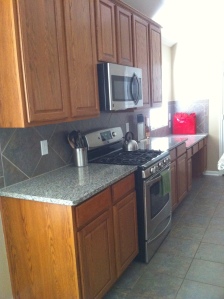
Before I start explaining the few easy steps, let me show you how our cabinets use to look like.

Back Camera

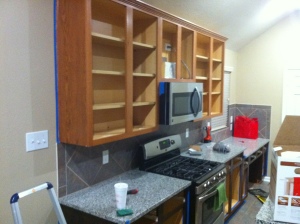
Step 1: Wipe off the cabinets with a microfiber towel to remove any dirt or dust.

Step 2: Apply the de-glosser onto a scrub pad and thoroughly clean the cabinet/door/drawer to de-gloss the surface.

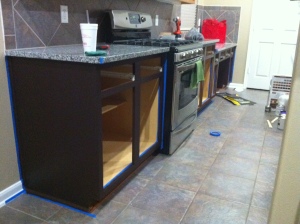
Step 3: With a paint brush, apply the bond coat with even strokes along the lining of the wood. (I applied 2 coats for the dark color I was looking for).

Step 4: (Optional) I applied the decorative glaze to give it a little glossy look. Without the glaze, the wood looked too dry for my taste.

Step 5: Brush on the protective top coat for a long lasting, durable finish.

Back Camera  Back Camera

photo

Here you go… Now you got yourself a new kitchen. You can then add in cabinet knobs or glass cabinet doors to give it a more modern feel. Thank you for reading.